Ingest and map ServiceNow users to Port user accounts
This guide demonstrates how to ingest ServiceNow users into your Port software catalog and automatically map them to existing Port user accounts based on email addresses.
We will leverage on Port's custom webhook integration, self-service actions and automations to ingest data from ServiceNow and map them to Port user accounts.
Once implemented users will be able to:
- Maintain a complete inventory of all ServiceNow users in your organization within Port.
- Automatically link ServiceNow users to their corresponding Port user accounts for seamless integration.
- Provide visibility into which ServiceNow users have Port accounts and which don't.
Prerequisites
This guide assumes the following:
- You have a Port account and have completed the onboarding process.
- You have a ServiceNow instance with admin permissions to access the user table and generate API credentials.
- You have permissions to create blueprints, self-service actions, and automations in Port.
Set up data model
To represent ServiceNow users in your portal, we need to create a ServiceNow User blueprint that can store ServiceNow user data and optionally link to Port user accounts.
Create the ServiceNow User blueprint
-
Go to the data model page of your portal.
-
Click on
+ Blueprint. -
Click on the
Edit JSONbutton in the top right corner. -
Copy and paste the following JSON schema:
ServiceNow user blueprint (Click to expand)
    {
        "identifier": "servicenow_user",
        "description": "ServiceNow User",
        "title": "ServiceNow User",
        "icon": "Servicenow",
        "schema": {
            "properties": {
            "user_name": {
                "type": "string",
                "title": "Username",
                "description": "The user's login name"
            },
            "name": {
                "type": "string",
                "title": "Full Name",
                "description": "The user's full display name"
            },
            "first_name": {
                "type": "string",
                "title": "First Name",
                "description": "The user's first name"
            },
            "last_name": {
                "type": "string",
                "title": "Last Name",
                "description": "The user's last name"
            },
            "email": {
                "type": "string",
                "title": "Email",
                "description": "The user's email address"
            },
            "employee_number": {
                "type": "string",
                "title": "Employee Number",
                "description": "The user's employee number"
            },
            "active": {
                "type": "boolean",
                "title": "Active",
                "description": "Indicates if the user is active"
            },
            "locked_out": {
                "type": "boolean",
                "title": "Locked Out",
                "description": "Indicates if the user account is locked"
            },
            "vip": {
                "type": "boolean",
                "title": "VIP",
                "description": "Indicates if the user has VIP status"
            },
            "password_needs_reset": {
                "type": "boolean",
                "title": "Password Reset Required",
                "description": "Indicates if the user's password needs to be reset"
            },
            "last_login": {
                "type": "string",
                "title": "Last Login",
                "description": "The user's last login time"
            },
            "phone": {
                "type": "string",
                "title": "Phone",
                "description": "The user's phone number"
            },
            "mobile_phone": {
                "type": "string",
                "title": "Mobile Phone",
                "description": "The user's mobile phone number"
            },
            "department": {
                "type": "string",
                "title": "Department",
                "description": "The user's department"
            },
            "title": {
                "type": "string",
                "title": "Job Title",
                "description": "The user's job title"
            },
            "manager": {
                "type": "string",
                "title": "Manager",
                "description": "The user's manager"
            },
            "location": {
                "type": "string",
                "title": "Location",
                "description": "The user's location"
            },
            "company": {
                "type": "string",
                "title": "Company",
                "description": "The user's company"
            },
            "roles": {
                "type": "string",
                "title": "Roles",
                "description": "The user's roles and permissions"
            },
            "time_zone": {
                "type": "string",
                "title": "Time Zone",
                "description": "The user's time zone"
            },
            "sys_created_on": {
                "type": "string",
                "title": "Created On",
                "description": "When the user was created"
            },
            "sys_updated_on": {
                "type": "string",
                "title": "Updated On",
                "description": "When the user was last updated"
            },
            "sys_updated_by": {
                "type": "string",
                "title": "Updated By",
                "description": "Who last updated the user record"
            },
            "failed_attempts": {
                "type": "string",
                "title": "Failed Login Attempts",
                "description": "Number of failed login attempts"
            }
            },
            "required": []
        },
        "mirrorProperties": {},
        "calculationProperties": {},
        "aggregationProperties": {},
        "relations": {
            "user": {
            "title": "Port User",
            "target": "_user",
            "required": false,
            "many": false
            }
        }
} -
Click on
Saveto create the blueprint.
Add Port secrets
Now let's add your ServiceNow credentials to Port's secrets:
- Click on the
...button in the top right corner of your Port application. - Click on Credentials.
- Click on the
Secretstab. - Click on
+ Secretand add the following secrets:SERVICENOW_INSTANCE_URL- Your ServiceNow instance URL (e.g., https://your-instance.service-now.com)SERVICENOW_API_TOKEN- A base64 encoded string of your ServiceNow credentials generated as:echo -n "your-instance-username:your-instance-password" | base64
Set up webhook integration
We'll create a webhook integration that can ingest multiple ServiceNow users at once and automatically establish relationships with existing Port users.
Follow the steps below to create the webhook integration:
-
Go to the Data Sources page.
-
Click on
+ Data Source. -
Select Webhook and click on Custom integration.
-
Name it "ServiceNow Users Sync".
-
Copy the webhook URL - you'll need this for the automation.
-
Copy and paste the following mapping into the Map the data from the external system into Port field:
ServiceNow users webhook mapping (Click to expand)
[
  {
    "blueprint": "servicenow_user",
    "operation": "create",
    "filter": "(.body.response | has(\"result\")) and (.body.response.result | type == \"array\")",
    "itemsToParse": ".body.response.result | map(select(.active == \"true\"))",
    "entity": {
        "identifier": ".item.sys_id | tostring",
        "title": ".item.user_name | tostring",
        "properties": {
            "user_name": ".item.user_name",
            "name": ".item.name",
            "first_name": ".item.first_name",
            "last_name": ".item.last_name",
            "email": ".item.email",
            "employee_number": ".item.employee_number",
            "active": ".item.active",
            "locked_out": ".item.locked_out",
            "vip": ".item.vip",
            "failed_attempts": ".item.failed_attempts",
            "password_needs_reset": ".item.password_needs_reset",
            "last_login": ".item.last_login",
            "phone": ".item.phone",
            "mobile_phone": ".item.mobile_phone",
            "department": "if .item.department | type == \"object\" then .item.department.value else .item.department end",
            "title": ".item.title",
            "manager": "if .item.manager | type == \"object\" then .item.manager.value else .item.manager end",
            "location": "if .item.location | type == \"object\" then .item.location.value else .item.location end",
            "company": "if .item.company | type == \"object\" then .item.company.value else .item.company end",
            "roles": ".item.roles",
            "time_zone": ".item.time_zone",
            "sys_created_on": ".item.sys_created_on",
            "sys_updated_on": ".item.sys_updated_on",
            "sys_updated_by": ".item.sys_updated_by"
        },
        "relations": {
            "user": {
                "combinator": "'and'",
                "rules": [
                    {
                        "property": "'$identifier'",
                        "operator": "'='",
                        "value": ".item.email"
                    }
                ]
            }
        }
    }
  }
] -
Click on
Save.
Set up self-service actions
We'll create two self-service actions in this section, one for fetching ServiceNow users and another for fetching a ServiceNow user via email for the automation and webhook to ingest data.
Sync ServiceNow Users self-service action
This action fetches all ServiceNow users and send them to the process ServiceNow users automation for processing.
The automation will then send the response to the webhook for ingestion.
Follow the steps below to create the action:
-
Go to the Self-service page.
-
Click on
+ Action. -
Click on the
Edit JSONbutton in the top right corner. -
Copy and paste the following action configuration:
Sync ServiceNow Users action (Click to expand)
    {
      "identifier": "sync_servicenow_users",
      "title": "Sync ServiceNow Users",
      "icon": "Servicenow",
      "description": "Fetch and sync all ServiceNow users to Port",
      "trigger": {
        "type": "self-service",
        "operation": "DAY-2",
        "userInputs": {
          "properties": {
            "sysparm_limit": {
              "icon": "DefaultProperty",
              "type": "number",
              "title": "Results returned per page",
              "description": "The maximum number of results returned per page (default: 10,000)"
            }
          },
          "required": [],
          "order": [
            "sysparm_limit"
          ]
        }
      },
      "invocationMethod": {
        "type": "WEBHOOK",
        "url": "{{ .secrets.SERVICENOW_INSTANCE_URL }}/api/now/table/sys_user?sysparm_query=ORDERBYDESCsys_created_on&sysparm_limit={{ .inputs.sysparm_limit }}",
        "agent": false,
        "synchronized": true,
        "method": "GET",
        "headers": {
          "RUN_ID": "{{ .run.id }}",
          "Content-Type": "application/json",
          "Accept": "application/json",
          "Authorization": "Basic {{ .secrets.SERVICENOW_API_TOKEN }}"
        },
        "body": {}
      },
      "requiredApproval": false
} -
Click
Saveto create the action.
Get ServiceNow user by email self-service action
This action fetches a single ServiceNow user by email and send the response to a process single service now user automation for processing. The automation will then send the response to the webhook for ingestion.
Follow the steps below to create the action:
-
Go to the Self-service page.
-
Click on
+ Action. -
Click on the
Edit JSONbutton in the top right corner. -
Copy and paste the following action configuration:
Get ServiceNow user by email action (Click to expand)
    {
      "identifier": "get_single_servicenow_user",
      "title": "Get ServiceNow User by Email",
      "icon": "Servicenow",
      "description": "Fetch a ServiceNow user to Port",
      "trigger": {
        "type": "self-service",
        "operation": "DAY-2",
        "userInputs": {
          "properties": {
            "email": {
              "icon": "DefaultProperty",
              "type": "string",
              "title": "Email of user",
              "description": "Email of the service now user"
            }
          },
          "required": [],
          "order": [
            "email"
          ]
        }
      },
      "invocationMethod": {
        "type": "WEBHOOK",
        "url": "{{ .secrets.SERVICENOW_INSTANCE_URL }}/api/now/table/sys_user?sysparm_query=email={{ .inputs.email }}&sysparm_limit=1",
        "synchronized": true,
        "method": "GET",
        "headers": {
          "RUN_ID": "{{ .run.id }}",
          "Content-Type": "application/json",
          "Accept": "application/json",
          "Authorization": "Basic {{ .secrets.SERVICENOW_API_TOKEN }}"
        },
        "body": {}
      },
      "requiredApproval": false
} -
Click
Saveto create the action.
Set up automations
Now we'll create the automations that process the ServiceNow users list and sends the response to the webhook for bulk ingestion and single user ingestion.
Create automation to bulk ingest ServiceNow users
This automation will trigger when the Sync ServiceNow Users action is executed. It will then process the ServiceNow users list and send the response to the webhook for bulk ingestion.
Follow the steps below to create the automation:
-
Go to the Automations page of your portal.
-
Click on
+ Automation. -
Click on the
Edit JSONbutton in the top right corner. -
Copy and paste the following automation configuration:
Process ServiceNow users automation (Click to expand)
Replace the webhook URLReplace the webhook URL with the one you created in the previous step.
{
  "identifier": "process_servicenow_users",
  "title": "Process ServiceNow Users",
  "description": "Processes ServiceNow users list and sends to webhook for bulk ingestion",
  "icon": "Servicenow",
  "trigger": {
    "type": "automation",
    "event": {
      "type": "RUN_UPDATED",
      "actionIdentifier": "sync_servicenow_users"
    },
    "condition": {
      "type": "JQ",
      "expressions": [
        ".diff.after.status == \"SUCCESS\""
      ],
      "combinator": "and"
    }
  },
  "invocationMethod": {
    "type": "WEBHOOK",
    "url": "<YOUR_WEBHOOK_URL>",
    "agent": false,
    "synchronized": true,
    "method": "POST",
    "headers": {
      "Content-Type": "application/json"
    },
    "body": {
      "response": "{{ .event.diff.after.response }}"
    }
  },
  "publish": true
} -
Click
Saveto create the automation.
Create automation to process single ServiceNow user
This automation will trigger when the Get ServiceNow user by email action is executed. It will then process the ServiceNow user and send the response to the webhook for single user ingestion.
Follow the steps below to create the automation:
-
Go to the Automations page of your portal.
-
Click on
+ Automation. -
Click on the
Edit JSONbutton in the top right corner. -
Copy and paste the following automation configuration:
Process single ServiceNow user automation (Click to expand)
    {
    "identifier": "process_single_servicenow_user",
    "title": "Process Single ServiceNow Users",
    "description": "Processes ServiceNow user and sends to webhook for ingestion",
    "icon": "Servicenow",
    "trigger": {
        "type": "automation",
        "event": {
        "type": "RUN_UPDATED",
        "actionIdentifier": "get_single_servicenow_user"
        },
        "condition": {
        "type": "JQ",
        "expressions": [
            ".diff.after.status == \"SUCCESS\""
        ],
        "combinator": "and"
        }
    },
    "invocationMethod": {
        "type": "WEBHOOK",
        "url": "<YOUR_WEBHOOK_URL>",
        "agent": false,
        "synchronized": true,
        "method": "POST",
        "headers": {
        "Content-Type": "application/json"
        },
        "body": {
        "response": "{{ .event.diff.after.response }}"
        }
    },
    "publish": true
} -
Click
Saveto create the automation.
Create automation to sync ServiceNow users when a new Port user is added
To ensure new Port users get mapped to ServiceNow users automatically, we'll create an automation that triggers when a new Port user is created. This automation will trigger the Get ServiceNow user by email action to fetch details of the ServiceNow user by email and trigger the process single ServiceNow user automation for processing.
Follow the steps below to create the automation:
-
Go to the Automations page of your portal.
-
Click on
+ Automation. -
Click on the
Edit JSONbutton in the top right corner. -
Copy and paste the following automation configuration:
Automation to sync ServiceNow users when a new Port user is added (Click to expand)
    {
    "identifier": "ingest_servicenow_user",
    "title": "Trigger servicenow_user ingestion automation",
    "description": "This will call the webhook endpoint to ingest a single service now user",
    "icon": "Servicenow",
    "trigger": {
        "type": "automation",
        "event": {
        "type": "ENTITY_CREATED",
        "blueprintIdentifier": "_user"
        },
        "condition": {
        "type": "JQ",
        "expressions": [],
        "combinator": "and"
        }
    },
    "invocationMethod": {
        "type": "WEBHOOK",
        "url": "https://api.getport.io/v1/actions/get_single_servicenow_user/runs",
        "agent": false,
        "synchronized": true,
        "method": "POST",
        "headers": {
        "RUN_ID": "{{ .run.id }}",
        "Content-Type": "application/json"
        },
        "body": {
        "properties": {
           "email": "{{ .event.diff.after.identifier }}"
        }
        }
    },
    "publish": true
} -
Click
Saveto create the automation.
Let's test it
-
Go to the Self-service page.
-
Find the "Sync ServiceNow Users" action.
-
Enter the number of records you want to fetch and click
Execute. -
Monitor the action execution in the Audit logs page.
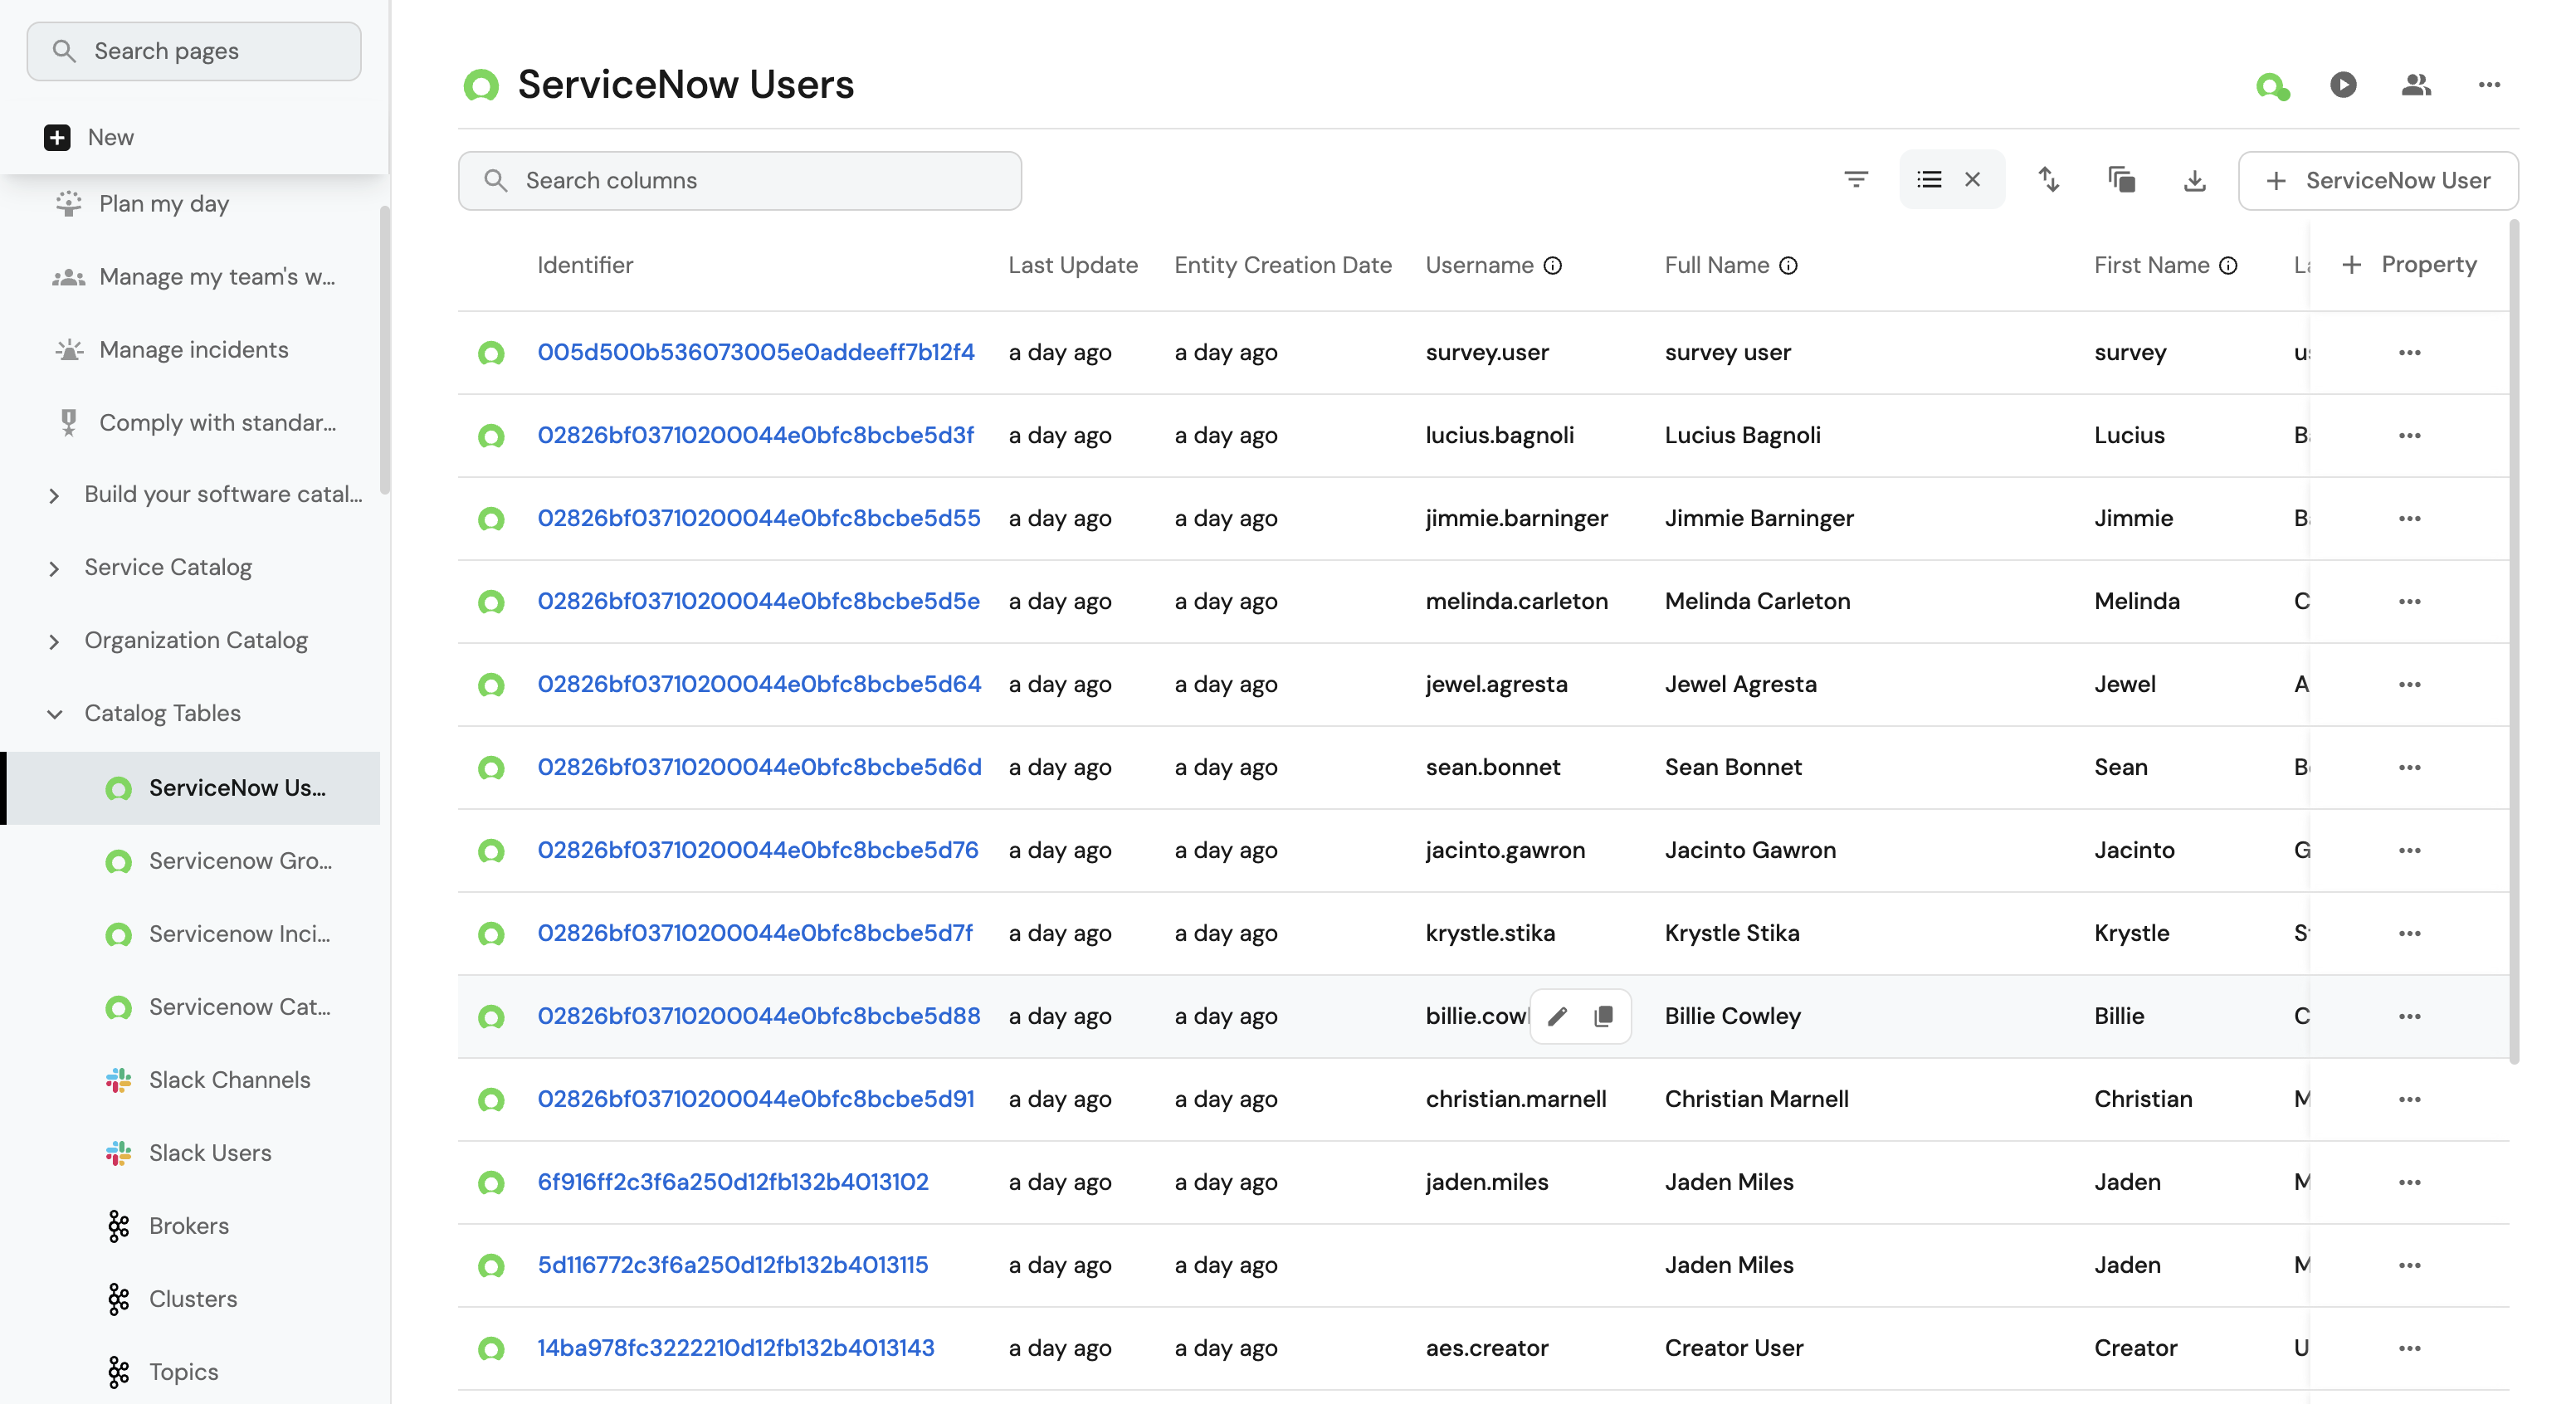
-
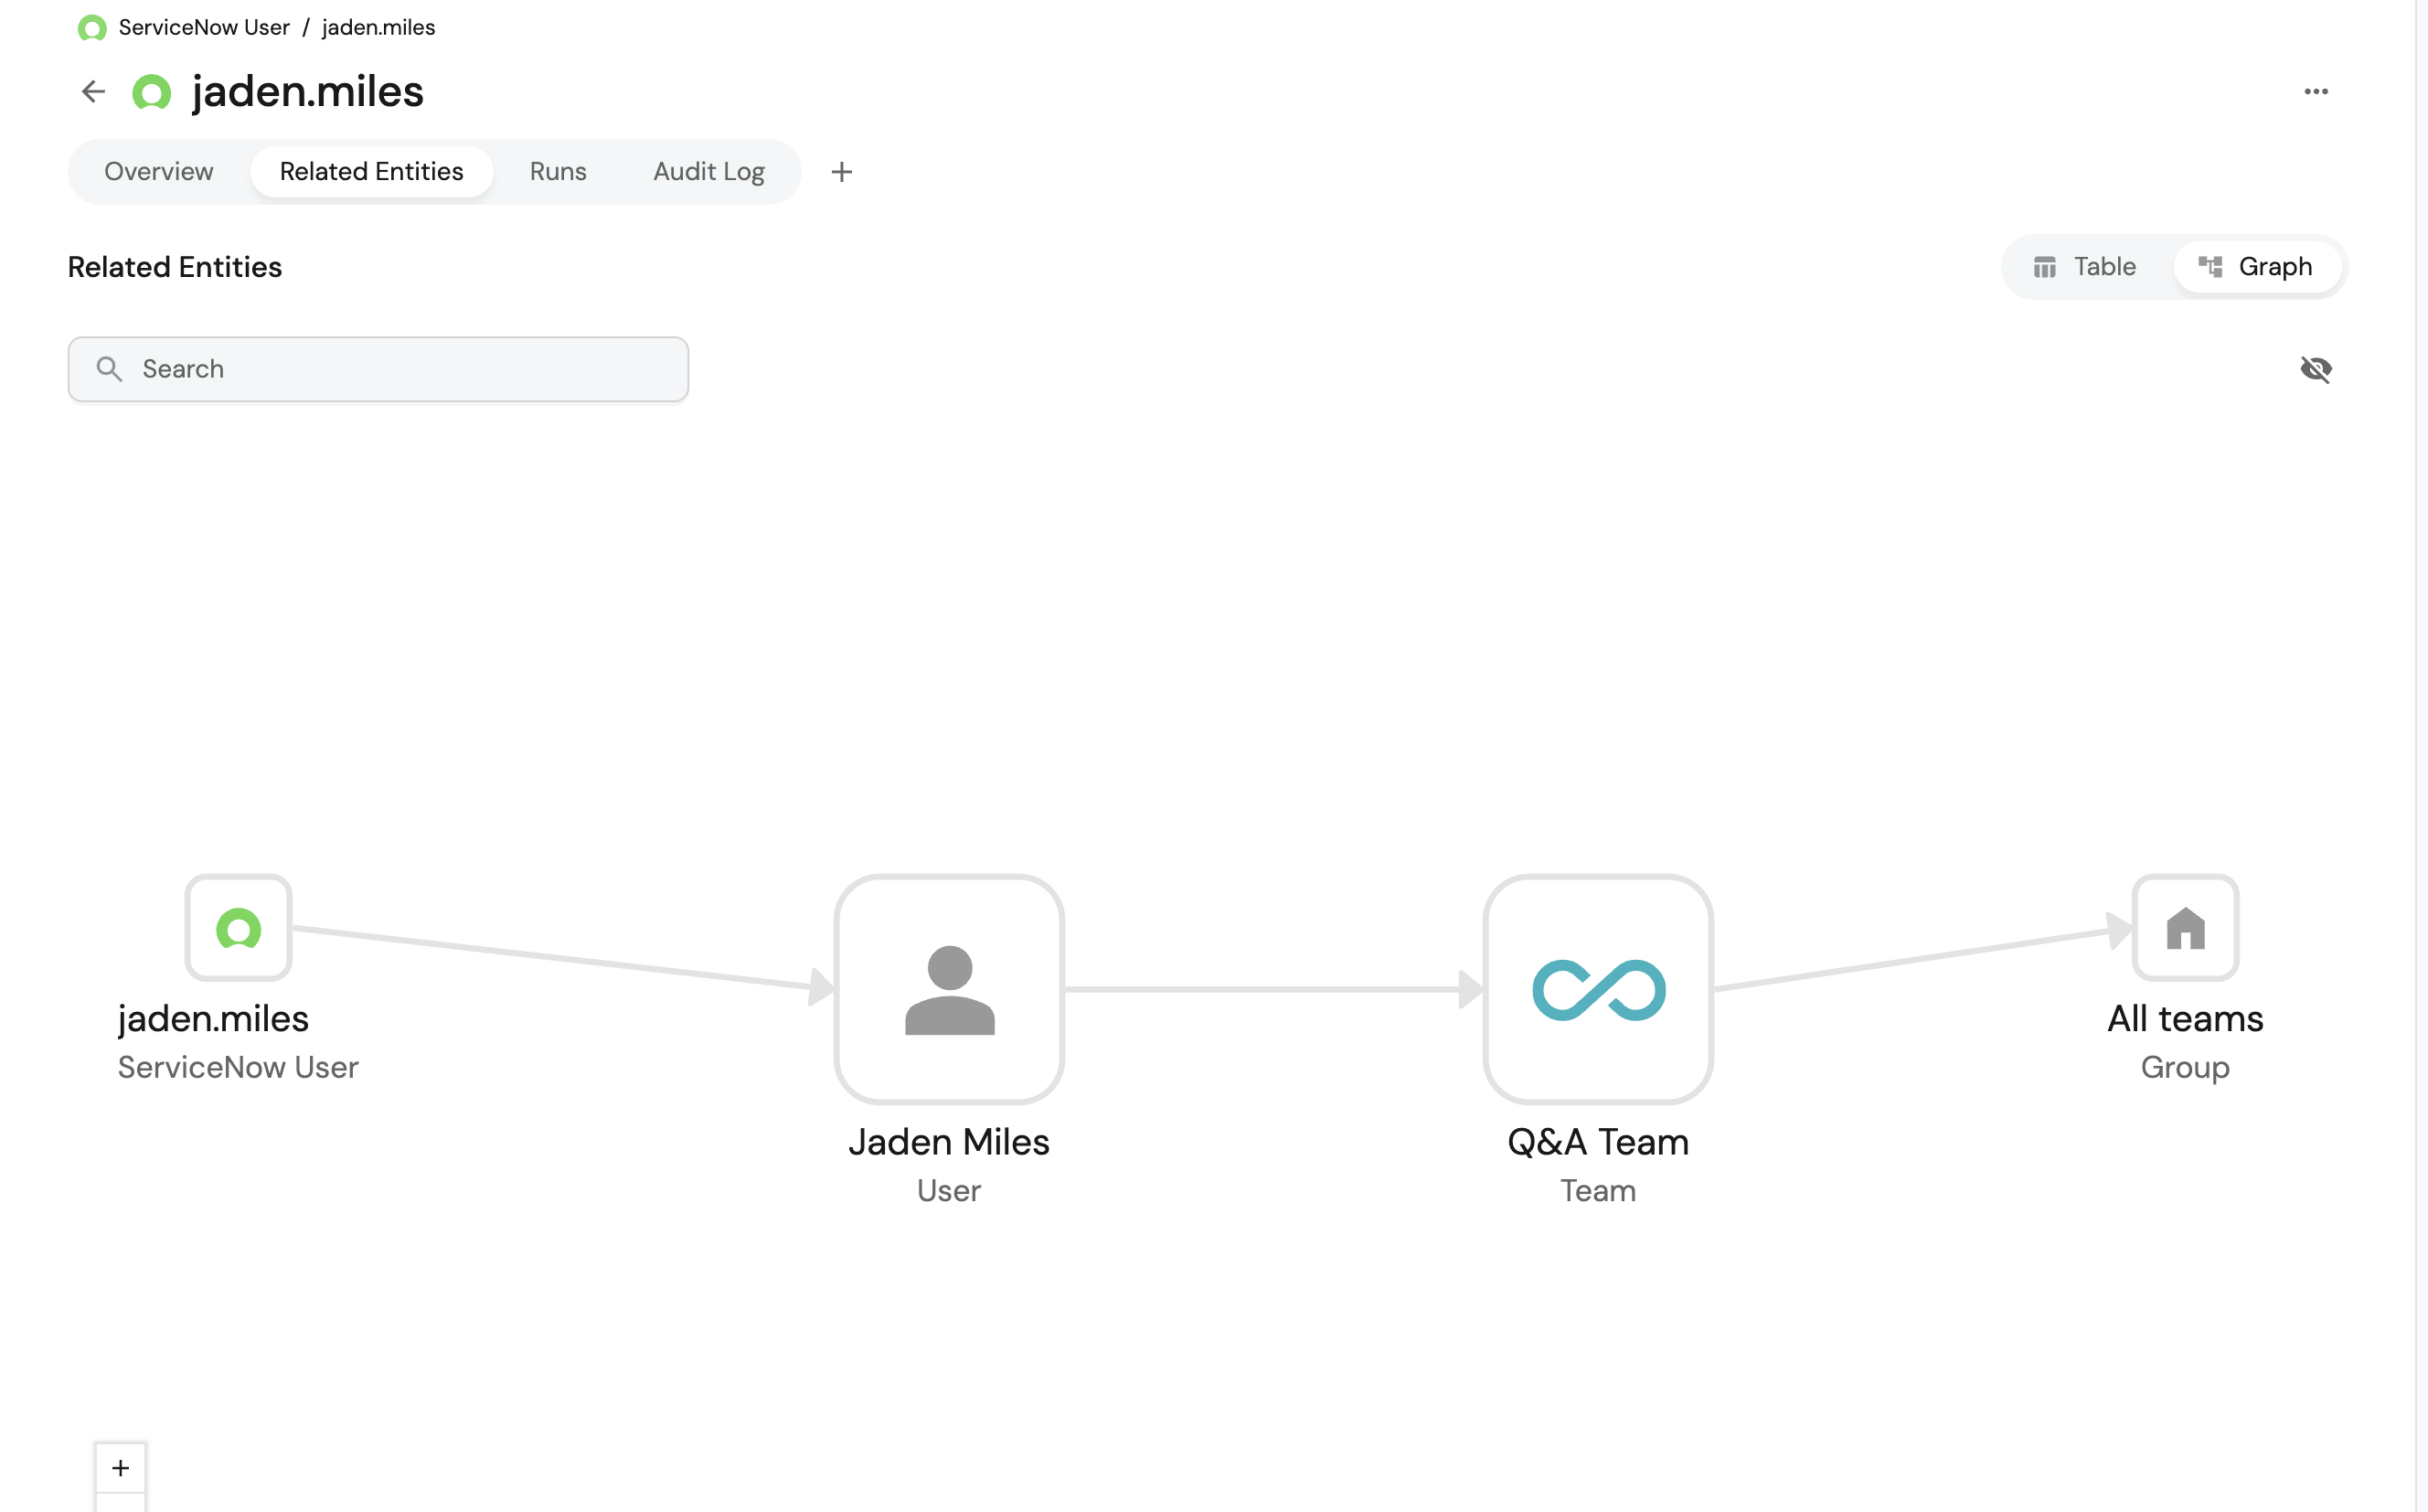
Verify that ServiceNow users are created in your catalog with proper relationships.
-
Verify that the ServiceNow user is created in your catalog with proper relationships.
Conclusion
You've successfully ingested ServiceNow users into your Port catalog and automatically mapped them to existing Port user accounts based on email addresses.